How To Launch Your Squarespace Website (and all the tech involved)
You’ve edited your copy, perfected the design and now you are ready to take on your final challenge: The tech. But before we get into that, I want to say a big “Congratulations” to you because you are about to officially launch your new Squarespace website to your community and I am truly so excited for you. This is the start of a new chapter. 🥳
Now for the tech. Let me guess. You’re probably thinking, “But wait…how do you connect a domain? Which Squarespace plan should I choose? How do I even share about this on instagram?” I’m answering all of those questions, and more, down below. So, let’s get into it!


Step 1: Login to Your Squarespace Website
If you don’t already have access to your new website, once the website is ready, you should receive full admin permissions so you can login to your website. Once you have these permissions you can setup your domain, pick a Squarespace plan, and make your site LIVE. ❤️
Side note: I always give full “ownership” permissions to my clients, but when you login to the permissions section of your site you may see “owner” (you) and “full administrator” (me/your designer). The only difference between owner and full administrator is that the “Owner” can transfer the “ownership”.
Step 2: Purchase, Connect or Transfer your Domain
If you don’t have a domain (often called a URL) you can purchase a domain right in Squarespace following a tutorial right here >
If you have a domain that’s already being used on ANOTHER Squarespace website and you want to move that domain to your brand new website, follow these instructions >
If you own a domain through GoDaddy, Wix, Weebly, Bluehost or some other platform, you can either transfer it to Squarespace or Connect it to your Squarespace website. The benefit of Transferring it is simply the tidiness around that fact that everything for your website is in one place. I recommend this for busy business owners! By transferring your domain to Squarespace, you’ll be charged for one additional year of domain registration with Squarespace. This usually ranges from $20-$70. Sometimes it’s actually easier to connect your domain (depending on your specific domain restrictions). Connecting can be easier if your domain has some restrictions around transferring it (this is dependent on platform and what type of plan you signed up for so it’s difficult to provide one suggestion for everyone). At the end of the day transferring AND connecting are both perfectly fine! Therefore I suggest trying to transfer it, and if you run into any tech issues, then try connecting it. By the way, when you transfer a domain to Squarespace they usually provide a disclaimer that this process can take up to 14 days. While it’s important to consider this, I can say that for *all* the websites I have done, on average it takes 1-2 business days (usually closer to 12 hours!). And as a reminder if it does take that long, there is plenty of content to create for the big launch as you wait (more on that down below). 🤠
To transfer a domain from GoDaddy follow these instructions >
To transfer a domain from Wix or Weebly follow these instructions >
To transfer a domain from another platform, scroll down on this page to find specific instructions for your platform >
To connect your domain to your Squarespace website >
Step 3: Pick and Purchase Your Website Plan
Your website plan is your website’s “hosting”. You are paying for security, reliability, and for your website to live on the internet! Hooray! Because I’m a Squarespace Circle member, when you work with me you’ll receive 20% off an Annual Plan for your first year of business 😎. You can always choose between a monthly subscription and an annual subscription based on your current cashflow.
So which plan? For my clients, I suggest logging into your website to view your pricing options (because you want to see that discount tallied for you). For most websites I suggest at least the “core plan” (or previously, the business plan) because it allows for the announcement bar, and it gives you the option to sell a digital product and create a shop page right on your website with a lower transaction fee. Squarespace makes minor changes to these plans every couple of years so I trust you’ll make the best decision for you.
To select a plan:
Login to your website > go to Dashboard > Settings > Site Availability > “Upgrade to Publish”

Step 4: Make your site LIVE!
Most of my clients will have a password protected website throughout the design process. Now is the time to switch from password protected to PUBLIC.
You can do this using this tutorial right here >

Step 5: Time to Share Your New Brand + Website
Cohesive, on-brand Social Media Templates can help to share your new brand and website. Depending on the package you choose those templates are typically included in a website design project. Once you have templates created, it’s time to think about the sequence of graphics and images to share your new brand and website.

The Launch Sequence:
I’ve created a Strategic Mini Guideline below to share all about your new website and brand on instagram. This is the order, or sequence, I suggest with proposed caption themes but feel free to listen to your own instinct on this. ✨
Image 1: A new photo of you (your face). This can be a new formal image of you, using your new brand imagery, or a more candid casual iphone photo. Either way, in the caption use this as an opportunity to reintroduce people to who you are and your new offerings. Share what you’ve been up to (any new certifications? summer travel winding down?). Position this post so people understand where you’ve been and what’s been going on behind the scenes.
Image 2: A Value-Based text only graphic. This graphic can be a quote you love, a fact you believe in, or a strong stance. In the caption, share your business values, and your reasoning for making a pivot in your business / why you decided to launch a business.
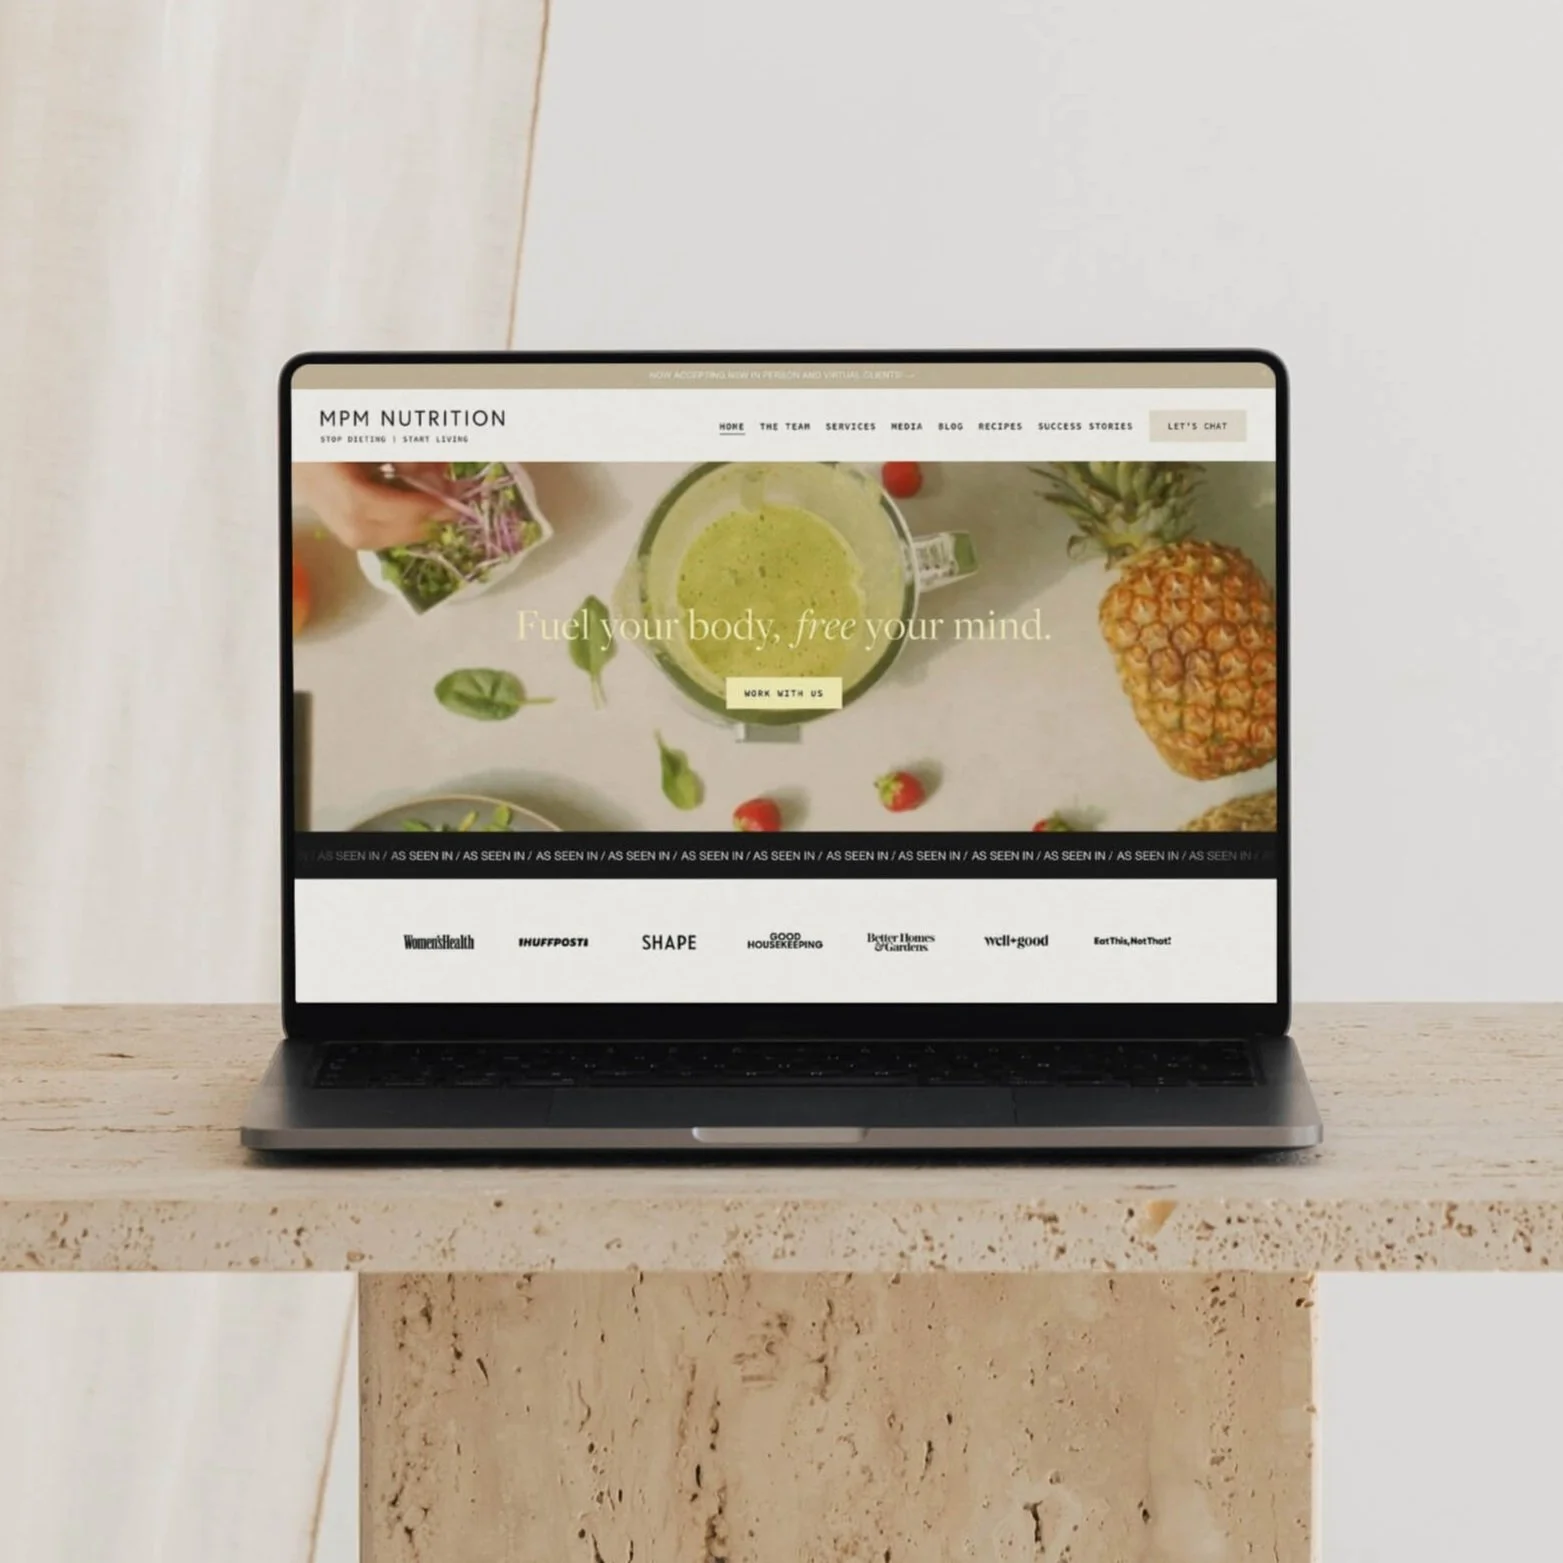
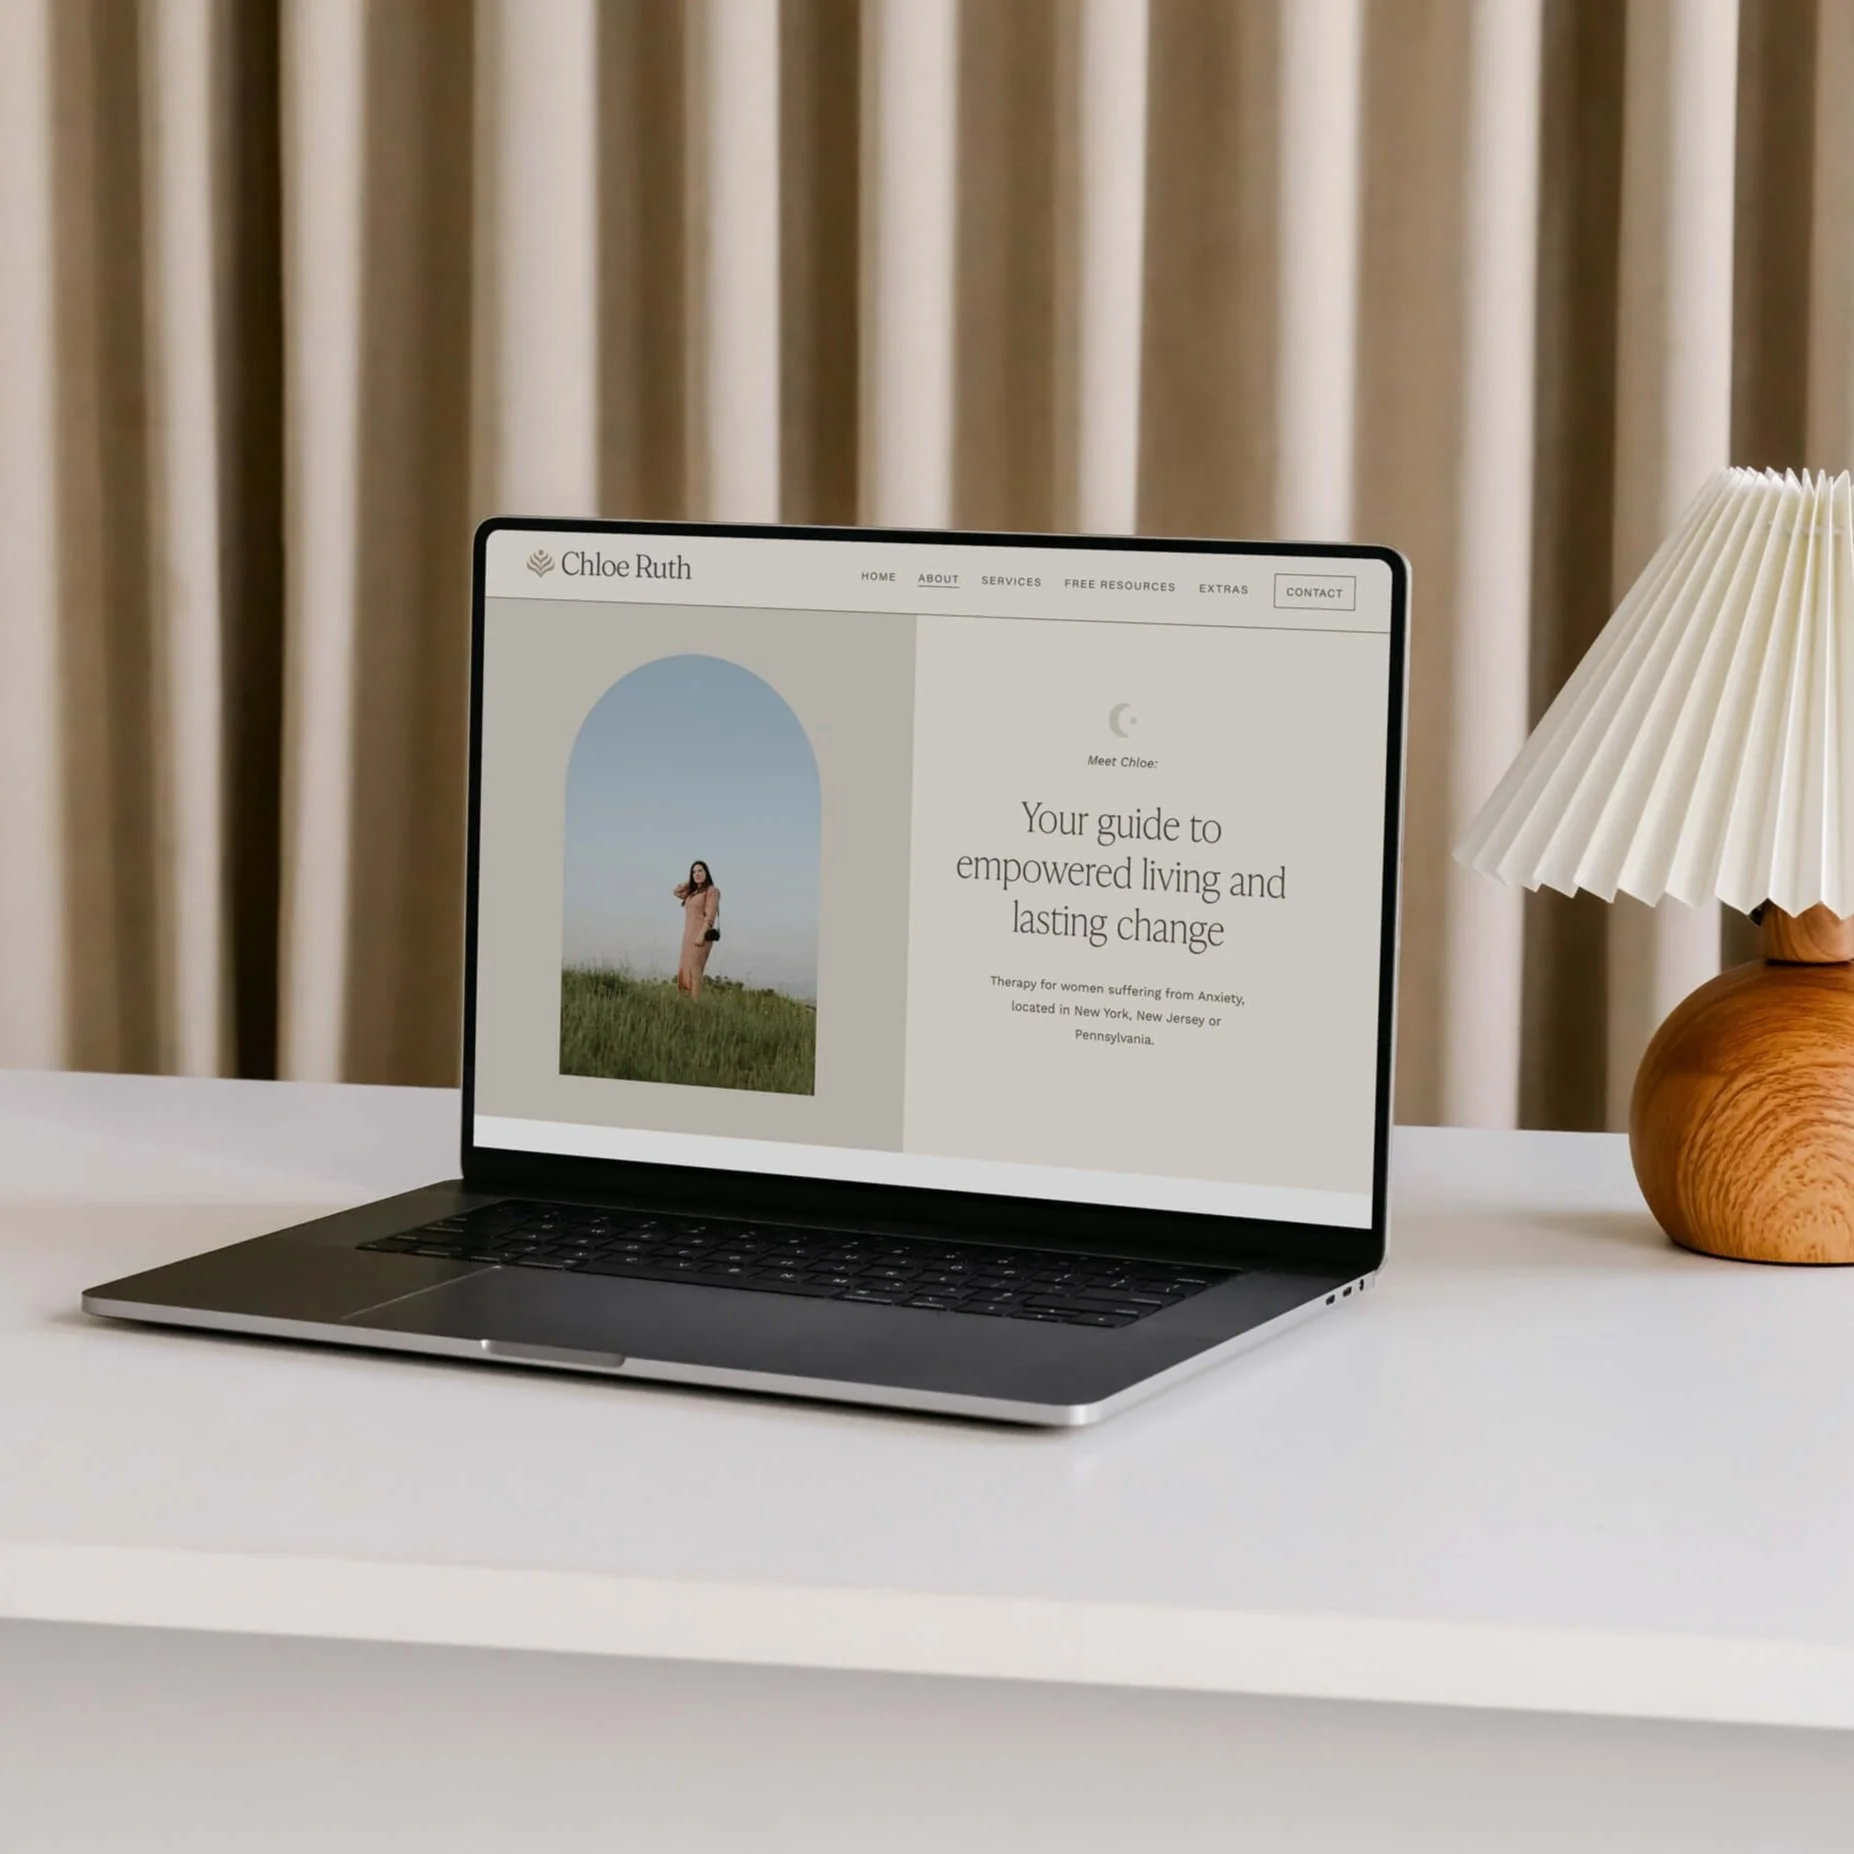
Image 3: Image of your website, logo or both. Share that you have a new website that’s officially live! This could be a carousel, single image, reel, (or whatever the latest and greatest instagram tool is). This post should feel celebratory. In the caption, share your call to action. It could be asking people to hop on a free call or sign up for your new freebie. If you’re able to give an incentive (i.e a discount that expires in a week, or a freebie that will expire in a week) that can help to drive more traffic to your website.
Image 4: A photo of you. In the caption share in detail what your services are (or what your primary service is). Share what’s included, why it matters, and how it’s impactful. Feel free to grab the copy for this caption directly from your new website to do this.
Image 5: A testimonial graphic. Okay okay, prepare to hear some crickets after posting this. Testimonial graphics don’t exactly encourage reshares or saves. But do not mistake the “lack of engagement” for “big impact”. 93% of consumers read online reviews before making a purchase. 62% of consumers are more likely to purchase if they see photos and videos of other customers. If you have real clients with real results to share, I suggest sharing these pretty consistently on instagram - It’s where your audience is, after all. In the caption I suggest elaborating on this testimonial with a specific story about this client.
Image 6: Your regularly scheduled instagram content. More on that below…
Instagram Marketing Suggestions:
I suggest having a few weeks of regularly scheduled content ready to go for instagram before you start sharing about your rebrand. You don’t want to make this big announcement and then go radio silent on your audience, right? How would that feel for you on the other end? A bit confusing, right? I suggest posting regularly (whatever that means for you) for at least 2 weeks, then share the brand launch sequence, and then continue posting regularly for 2 more weeks. This will build, or rebuild, trust with your audience. In addition to this month of posting, it’s a great idea to create a scheduled 90 day marketing plan to get the word out about your new offerings. This way, after that month is up, you can continue to offer value as you share about the opportunities your community has to work with you.
Side note: I have many clients who chose to use instagram in a very flowy way…occasionally posting, as it feels aligned to do so. I fully support this strategy if it makes sense within the big picture of your marketing strategy. However, if there was ever a time to put a little bit of structure around consistent instagram posting, this would be the time. Even if this means delaying the big reveal of your new website as you write your content.
Email Marketing Suggestions:
If you have an existing email list and you want to share your website launch with your email community, I suggest building out a structure similar to the above instagram marketing framework 💌. You can do this simultaneously (instagram and email marketing). If you haven’t been sharing to your email list consistently, I suggest sharing for “two weeks”, then share the “launch sequence”, and then share for “two more weeks”. This will obviously look a bit different on email vs instagram. For example, maybe the graphics are different, maybe you have the space to elaborate more and provide more value. I would always suggest providing your email list more value than your instagram audience. I would even consider creating a special promo just for your email list (post this on instagram to encourage email signup). Every business is different, every email marketing strategy is different, but the same general rule applies here: You want to sandwich your “Brand Launch” with some consistency. That way, your audience can properly share in the excitement with you! And better yet, they will be better positioned to actually click that ‘book a consult call’ button.
Side note: New to email marketing? Many of my clients use and love FloDesk. They find it easy to use and by-far the prettiest email marketing platform out there. You can get 50% off your first year using this link here >

That’s it! I hope this blogpost feels supportive for where ever you are in the process. Whether you’re a client reading this and excited to launch your new website or whether you’re someone on the internet planning for your website redesign.
If we haven’t met yet, I’m Jena Thielges a Brand and Website Designer. I specialize in working with women who are coaches, therapists, healers and service providers. Founded in 2019 on seven years of agency experience, Sundai Studio is more than a brand and web design studio—it’s your energy, embodied in design. Because even your branding should feel aligned.
Check out my offers here and get in touch if you’re ready to book a free consult call!
Y O U M A Y A L S O E N J O Y …